Image Map
Showing posts with label school. Show all posts

Mini Post-it Rubrics

Thursday, September 17, 2015


This week, I collected a short writing assignment from my students that asked them to create a billboard slogan that summed up key ideas in our One and Only Ivan Novel Study so far. I wanted to quickly grade the assignment with a rating that was more specific than a checkmark at the top of the page.

 The One and Only Ivan

I had a vague memory of something I had seen on Pinterest that showed a piece of copy paper with six sticky notes attached and a brief explanation about running Post-it notes through a printer. I started messing around with 3" x 3" box shapes in a Word document and designed a template for mini rubrics that would print on Post-it notes. I love these rubrics.


I opened a new Word document and set the margins to .6" on all sides. I inserted a square shape and set the size to 3" x 3". The shape had "no fill" and a black outline. I right clicked on the shape to choose "add text" and typed the line items I needed for the rubric. Once I completed the first rubric, I copied and pasted the box five times for a total of six boxes on the page. I moved the boxes, so I had three rows of two boxes each and printed one copy.

After I had one printed copy of the rubrics, I went back to my Word document and removed the black outline from the edges of each box. On my hard copy of the rubric, I attached six Post-it notes with the adhesive strip along the top edge of each box. To print, I ran the paper through my printer according to the icons for printing in my feed tray. On my printer, the side with the sticky notes is face down, and the sticky edge of each box inserts first. When the paper exits the printer, the finished page is face up.


After my rubrics were finished, I made more Post-its for my son's close reading homework assignment. He needed to add sticky note thoughts while reading the last few chapters of From the Mixed Up Files of Mrs. Basil E. Frankweiler. He codes each of his ideas while he reads, so we created printed Post-its to make his notes neater. He circled the type of comment he was adding and then wrote his thoughts. CLICK HERE for the close reading Post-it template.

OB = observation
OP = opinion
CT = character trait
P = prediction

One drawback to Post-it note printing is removing six individual sticky notes, reattaching fresh notes, and printing again. I needed 35 copies of my mini rubrics and had to run my template five times through the printer. It is a little time consuming. The other drawback (for me) is the smudging I had with my ink jet printer. Since the sticky notes are loose at the bottom, the words did not print cleanly on all parts of each Post-it. I am anxious to try running the page through my laser printer at school.


Happy Grading!

Caitlin

What to Buy at the Back to School Sale

Monday, August 3, 2015


Planning to shop the Teachers Pay Teachers Back to School Sale? Me too. I am having a tough time prioritizing what I need. If you are in the same boat as I am, check out some great Lesson Deli sellers "must haves" and happy shopping! (Don't forget to use code BTS15 at checkout.)

 Grammar Flip Chart

The Grammar Flip Chart: This product includes easy to follow notes and tips for all of the essential parts of speech and sentence structures. The product includes 3 options for building the flipchart (cascading cards, binder ring, Dollar Store photo album). Click HERE to see the product.

 Greek and Latin Root Bundle

Greek and Latin Root Bundle: 40 weekly lessons including hands on activities. Great for Daily 5 Word Work! Click HERE to see the product.

 Decimal ZAP Bundle

Decimal ZAP Bundle: Zap games are quick and easy to implement. Add them to a corner of your room for early finishers to pick and play. Click HERE to see the product.
 SS Quick Checks
4th Grade Social Studies Spiral Review: This 30 page set will have your students reviewing key concepts for the new Learning Standards in 4th grade all year long! Click HERE to see the product. (5th grade version also available)

 Common Core 4th Math Club

Common Core Club 4th Grade Math Membership: This growing bundle is a great value. Purchase an entire year's worth of 4th grade math resources that includes task cards, games, homework, and assessments. Click HERE to see the product.

 ELA Made Easy

ELA Made Easy: An Upper Elementary Resource Bundle: If you are looking to implement the Daily 5 in your classroom, this bundle will make your life very easy! Click HERE to see the product.

 Spot It Game

Personification Spot It and Steal It Game: Personification is a breeze to teach with this engaging, hands-on game! Click HERE to see the product.

The Lesson Deli

Pinterest: A Baker's Dozen

Sunday, August 2, 2015

Pinterest: A Baker's Dozen

I love Pinterest! Whether I am searching for a fabulous dessert, the next craft project, or an idea for the classroom, I'm on Pinterest. Today I'm bringing you some favorite boards from the Lesson Deli ladies.

1. Diane from Fifth in the Middle just loves Bright Ideas for the Classroom. This board is full of great ideas that you can easily incorporate into your classroom.
Pinterest: A Baker's Dozen

2. Everyone loves a good chuckle, especially with memes. The Pensive Sloth has created a board full of School Memes & Funnies.
Pinterest: A Baker's Dozen

3. Are you looking for some physical science ideas? Check out Physical Science in the Middle Grades for ideas to teach vocabulary and get hands-on STEM activities.
Pinterest: A Baker's Dozen

4. Good boards for history and social studies are hard to find. 5th Grade Social Studies from The Whimsical Teacher is filled with great geography and history pins.
Pinterest: A Baker's Dozen

5. Need a gift idea for a teacher? Caitlin from The Room Mom has gathered some terrific ideas on her board: Good Teacher Gifts.
Pinterest: A Baker's Dozen

6. Fractions are a hard concept for kids to master. For some fabulous fraction ideas, check out Math Rules! #Fractions by Interactive Learning from Miss Stefany.
Pinterest: A Baker's Dozen

7. Stefany also has a board for tutoring. Check out Tutor Tools for tutoring and teaching ideas.
Pinterest: A Baker's Dozen

8. How organized are you? I know I can always use some help in this area. Amy from Teaching Ideas 4 U has a solution. She's created a Classroom Organization board to help us all out. Many organization ideas posted here.
Pinterest: A Baker's Dozen

9. Amy also has an American History board for grades 3-8.
Pinterest: A Baker's Dozen

10. For those of you that are teachers in Ohio, you need to check out this board! Jennifer from JB Creations has a Pinterest board for Ohio Teaching Resources.
Pinterest: A Baker's Dozen

11. Another board Jennifer offers is Education. You can find all sorts of goodies here that pertain to the classroom.
Pinterest: A Baker's Dozen

12. I have several teaching boards on my Pinterest account. My favorite board, however, is my Recipe board. I love to bake and collect recipes. You might just find something to make and take into the teacher's lounge.
Pinterest: A Baker's Dozen

13. The Lesson Deli offers several boards on Pinterest for teachers of the middle grades. We have boards on math, reading, writing, social studies, science, holidays, classroom ideas, and teacher humor.
Pinterest: A Baker's Dozen

Be sure to check them out and follow us!


4 Shortcuts for Creating and Formatting Graphic Organizers

Tuesday, June 9, 2015


I am a table girl. I use them all of the time to create graphic organizers for my class. I like how they provide a framework and direction for the students. After students add information to a graphic organizer, the ideas are sorted and grouped in a way that help students develop generalizations for our units of study, review key concepts, and visualize a big picture.

I use MS Word (I know-- I am in the minority) to build all of my graphic organizers. Since many schools use Word as the primary way to publish documents in the classroom, I thought it might be worth sharing some of my formatting strategies. These are good technology tips for both teachers and students.


The best tip I can give people using MS Word is to turn the formatting button on. This shows all of the background strokes you use while creating a document. None of the background symbols appear when printing, but it allows you to see where you have pressed buttons and what types of spacing you have. If your students have all kinds of funky formatting happening in their school documents, turn the formatting button ON to see all of the times they pressed ENTER!


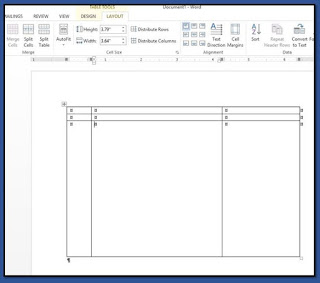
Next, insert a basic table with the needed numbers of rows and columns. Don't worry if you want to add or delete rows and columns later; it is easy to do. Once you have a basic table in the Word document, you are ready to customize. Most of the functions you will use will be accessed under the LAYOUT tab. This tab is only visible when you have clicked your cursor inside a cell (one of the boxes) on the table.

1. Making the Table Larger


  • To make the table cells (boxes) larger, hover the cursor over the bottom line. When it changes to two parallel lines with an up and down arrow, left click, hold, and drag down. 
  • To move any of the gridlines within the table, hover over the lines you would like to move, wait for the parallel icon with up down arrows to appear, left click, hold, and drag. 


2. Making the Rows and Columns Equal Sizes


  • To distribute rows evenly, highlight all of the rows you would like to be the same height. Select distribute rows in the LAYOUT tab. To distribute columns evenly, highlight all of the columns you would like to be the same width. Select distribute columns. This is where the formatting function comes in handy. There will be a small circle inside each cell. You can see if you have grabbed the cells you need by making sure the little circles in the appropriate boxes are highlighted. 


3. Adding Rows and Columns


  • To insert additional rows or columns, click your cursor in the cell next to where you want to add the row or column. Choose insert above, below, right, or left depending on what you need. 


4. Adding and Formatting Text


  • To add text, click in the cell where you need the text. Type your words (I like to add all words first then work on the formatting). 
  • To change the font, make the size, bigger, center, etc. use the buttons in the HOME tab you use when formatting regular documents. 
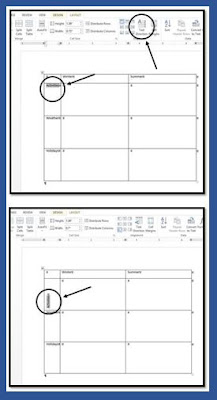
  • To change the text direction, highlight the text you want to flip and click the text direction button. Click multiple times until the text is turned the direction you need.


  • To align the text within the cell, click the text symbols that show different line spacing within a box right next to the text direction button. 


Spend some time clicking around in the LAYOUT tab of your document. You can merge and split cells, turn gridlines on and off, and add background colors to each cell, row, or column. You can also click outside of your table and insert clipart pictures. Right click on the picture and choose wrap text/in front of text. After that, you can drag your picture anywhere on your page.

For a printable version of these table tips with step by step instructions and screen shots, visit Creating a Graphic Organizer to download. I also have free printable directions for formatting MS Word essay documents available for free at my TeachersPayTeachers store.

Happy Creating!
Caitlin

TheRoomMom

Making Number Lines

Wednesday, January 21, 2015


A great resource for making number lines. 

A great number line is hard to find. Now there is a site where you can custom make number lines to suit your needs for free.

At math-aids.com there are many options to choose from.

1) You can generate blank number lines. Your options include positive or negative numbers, and different ways to break up the number line into whole numbers or fractions.

2) You can create worksheets to add or subtract numbers on a number line.

3)You can create worksheets to locate fractions, mixed numbers, or decimals on a number line. This also includes positive or negative numbers.


Revolutionary Thinking Maps: Causes of the American Revolution

Thursday, December 25, 2014

I started a series this summer on using Thinking Maps to teach about the American Revolution.  I use thinking maps all the time to help students visually represent content.  You can read the first post HERE on using a brace map to analyze the Declaration of Independence

For today, let's talk about the multi-flow map.  A multi-flow map can be used when something has multiple causes and/or effects.  We use them a LOT in history and science.  For example, last week in science we used a multi-flow map to show the multiple causes on why the wetlands are disappearing.  Here's an example of a multi-flow map showing the causes leading up to the American Revolution.
Next time you are teaching and need a graphic organizer to show multiple causes and/or effects, give the multi-flow map a try!


--The Pensive Sloth

PS--Did you know this makes for a GREAT opinion writing assignment?  Click HERE to learn more!


Protecting Paperback Books

Sunday, August 17, 2014

classroom library

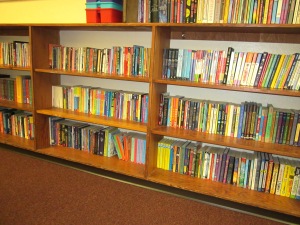
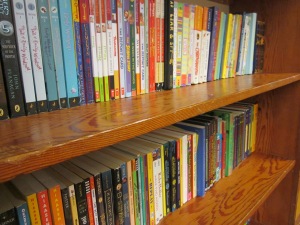
My classroom library is my pride and joy. It is like a third child to me, and I take great pains to protect it. Many student hands come in daily contact with the book collection and have the potential to destroy one of my cherished books. One defense I use to protect my library is to wrap each book in clear contact paper. This is a labor of love for sure but well worth it. If you have invested both time and money in a quality classroom library, wrapping your books will extend their lifespan.

covering books materials

Materials
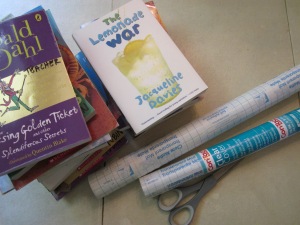
  • Con-Tact Brand Shelf Adhesive Shelf Liner clear with matte finish and gridlines (I usually purchase at WalMart or Staples)
  • paperback books
  • sharp scissors
  • clear, flat surface like a large tabletop with a straight edge
Directions
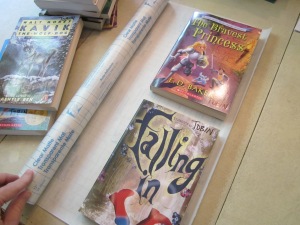
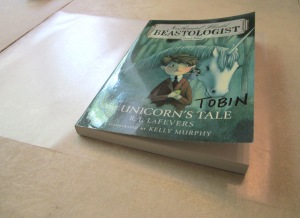
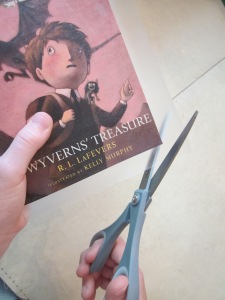
  • For standard sized paperback books, measure 2 books of about the same size at the same time. Unroll a little of the contact paper with the gridlines facing down and the roll unwrapping to the left. Set two books, cover facing up, on the contact paper. The books act as a weight to hold the contact paper still as well as guidelines for measuring the size of the cover needed for the book.
covering books step 1
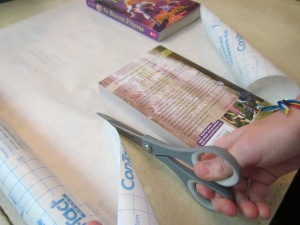
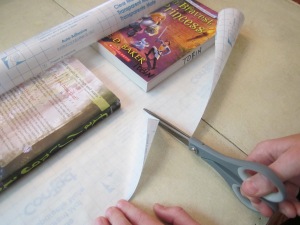
  • Carefully take the fattest book and roll it over the contact paper to the left, so the cover will be face down. This measures the length of contact paper you will need for both books. Cut the contact paper about 1 inch beyond the edge of the fatter book. Use the gridlines to help cut straight lines.
covering books step 2
  • Keeping the books spaced on the contact paper, cut down the center of the two books making sure there is (roughly) even amounts of contact paper above and below the edges of each book.
covering books step 3
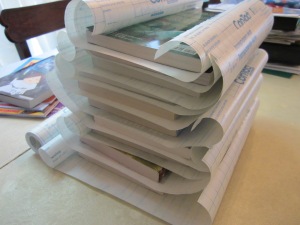
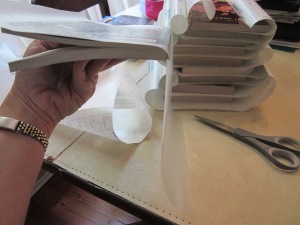
  • Cut sheets of contact paper for all books that need to be covered at one time to make the process more efficient. Keep each book with its matching piece of contact paper.
covering books contact paper prep
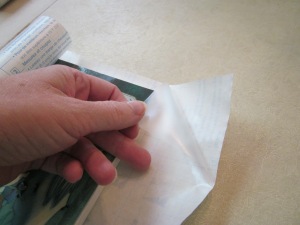
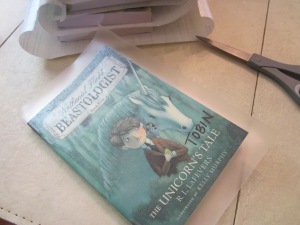
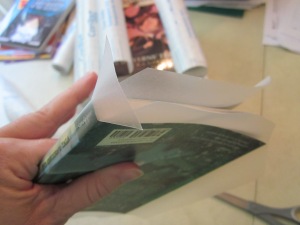
  • Take one piece of contact paper and put it on a flat, clear surface with the gridlines down. Set the book that goes with that piece of contact paper on top. The paper rolls up a little, and the book helps keep the contact paper spread out. Using your fingernail, gently peel away the paper backing starting at the top or bottom corner. I like to start with the top right corner, and I am right-handed. If you do not pull the backing away evenly, the paper will crease leaving a line that looks like a scratch (which drives me crazy). As you pull the backing away, lift the paper up off the table letting the book fall off.
covering books step 4

covering books step 4a
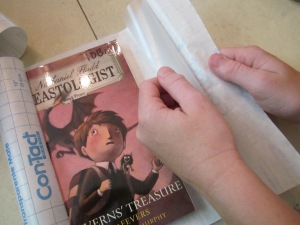
  • Once the backing is off the contact paper exposing the sticky side, place the paper sticky side up on your flat surface landscape direction. Have the bottom edge of the contact paper line up with the bottom, straight edge of the table. This will help keep book placement on the contact paper straight and even.
  • Gently set the back cover of your book near the right edge of the contact paper. Try to leave about a 1-inch border on the top, bottom, and right side of the book. In other words, center the top and bottom of the book on the contact paper and have the book close to the right edge of the contact paper.
covering books step 5
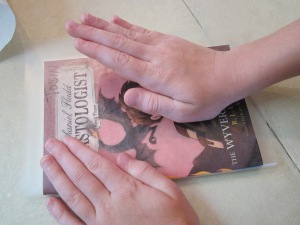
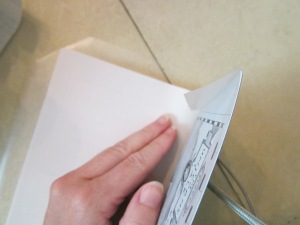
  • Pick up the book from the right side and smooth the back of the book with your free hand. Begin to wrap and push the contact paper around the spine of the book. Turn the book over and carefully press the contact paper across the cover pushing from the spine towards the loose end of the pages.
covering books step 6

covering books step 7
  • Smooth out any bubbles between the book and contact paper by pushing gently with your fingers and/or heel of your hand to the closest edge.
covering books step 7a
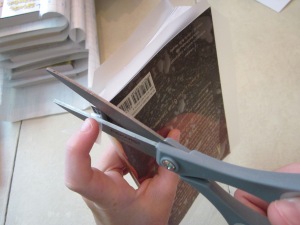
  • With your scissors, cut diagonally along the top 2 outside corners and the bottom 2 outside corners. You will snip off triangles.
covering books step 8b
  • Make diagonal snips on the front and back corners near the spine.
covering books step 8
  • Press the sticky tab of contact paper on the top of the spine to your pointer finger and pull it back and down until it separates just a little below the spine of the book. Snip the tab of contact paper off the book. Repeat at the other edge of the spine.
covering books step 9a
  • You will now have 3 flaps hanging over the edge of the front cover of the book and 3 flaps on the back. Carefully wrap the flaps around the cover of the book and stick them down to the inside of the covers, pressing carefully to avoid wrinkles.
covering books step 10

covering books step 10a
Notes
  • Your first few books will probably have wrinkles and mis-aligned contact paper. You get better (and faster) at covering the more you practice!
  • There are a variety of clear "shelf" papers available. The Con-Tact brand is my favorite, and the easiest for me to use.
  • If you have a large library, I would not recommend going back to cover every book. I would begin covering any new books that you add to your collection and any damaged books that you have.
  • To cover a damaged book (hardback or paperback), repair with clear packing tape first, then wrap in contact paper.
classroom library 3

 I would love to hear some other suggestions to help care for a classroom library. What steps do you take to keep the books in good condition and accounted for? 

Caitlin Tobin