Image Map

Mini Post-it Rubrics

Thursday, September 17, 2015


This week, I collected a short writing assignment from my students that asked them to create a billboard slogan that summed up key ideas in our One and Only Ivan Novel Study so far. I wanted to quickly grade the assignment with a rating that was more specific than a checkmark at the top of the page.

 The One and Only Ivan

I had a vague memory of something I had seen on Pinterest that showed a piece of copy paper with six sticky notes attached and a brief explanation about running Post-it notes through a printer. I started messing around with 3" x 3" box shapes in a Word document and designed a template for mini rubrics that would print on Post-it notes. I love these rubrics.


I opened a new Word document and set the margins to .6" on all sides. I inserted a square shape and set the size to 3" x 3". The shape had "no fill" and a black outline. I right clicked on the shape to choose "add text" and typed the line items I needed for the rubric. Once I completed the first rubric, I copied and pasted the box five times for a total of six boxes on the page. I moved the boxes, so I had three rows of two boxes each and printed one copy.

After I had one printed copy of the rubrics, I went back to my Word document and removed the black outline from the edges of each box. On my hard copy of the rubric, I attached six Post-it notes with the adhesive strip along the top edge of each box. To print, I ran the paper through my printer according to the icons for printing in my feed tray. On my printer, the side with the sticky notes is face down, and the sticky edge of each box inserts first. When the paper exits the printer, the finished page is face up.


After my rubrics were finished, I made more Post-its for my son's close reading homework assignment. He needed to add sticky note thoughts while reading the last few chapters of From the Mixed Up Files of Mrs. Basil E. Frankweiler. He codes each of his ideas while he reads, so we created printed Post-its to make his notes neater. He circled the type of comment he was adding and then wrote his thoughts. CLICK HERE for the close reading Post-it template.

OB = observation
OP = opinion
CT = character trait
P = prediction

One drawback to Post-it note printing is removing six individual sticky notes, reattaching fresh notes, and printing again. I needed 35 copies of my mini rubrics and had to run my template five times through the printer. It is a little time consuming. The other drawback (for me) is the smudging I had with my ink jet printer. Since the sticky notes are loose at the bottom, the words did not print cleanly on all parts of each Post-it. I am anxious to try running the page through my laser printer at school.


Happy Grading!

Caitlin

Amazon Book Listing Writing Activity

Sunday, August 30, 2015


My school requires a summer reading assignment for each grade level. In my 4th grade class, students read one required book and three "free choice" books from a list I provide. This year, I asked rising 4th grade students to read The Lemonade War by Jacqueline Davies. I do not like to dwell on the summer reading for too long at the beginning of the year, but I do want students to complete some sort of writing assessment. This year students created a fun Amazon book listing.

First, we looked at actual book listings for favorite books I had read over the summer (hint, hint... generating book recommendations for your students). We identified key features in an Amazon book page and items that seemed to be the same in every book listing.

Students discussed the differences between the book summary at the top of the listing and the book reviews at the bottom of the site page. We noted that the summaries contained more facts and less opinion, but the summaries did try to entice a reader. We also noticed how the summaries did not give away the ending or any surprise twists but created a little bit of a cliff hanger for a potential reader.

Finally, we discussed the "Frequently Bought Together" section in each Amazon listing and the purpose of that feature.

I designed an Amazon-like template and gave the students a copy. Each student completed an Amazon book listing for The Lemonade War that included the title of the book, author, a book level that the students determined like 3rd to 5th grade or 8-11 years old, year published, star rating, summary, and three additional book suggestions.
It is a simple writing activity that could be used for any novel. It incorporates many literature skills like summarizing and identifying important details and main characters. I was also able to sneak some library skills into the assignment by having students look for the year published and choose a reading level for the book. My favorite piece of the assignment is asking students to generate three additional book suggestions that would be good "next reads" to share with classmates.

To download a copy of the Amazon template (and see a few more writing activities for novel studies), CLICK HERE. To purchase a complete Lemonade War novel unit CLICK HERE.

Happy Reading!

Caitlin
TheRoomMom

Do This! Not That...Back to School Blog Hop

Friday, August 14, 2015


You made it!  Thanks again for hopping with us! We hope you found many valuable tips to implement in your classroom ASAP and discovered what tricks you can throw right out your classroom window!  Best wishes to you this school year. Check back with us often!

Enter to win the $100 TpT gift card below! 
a Rafflecopter giveaway

To hop through again, head to the next stop!

http://mrsbeerslanguageartsclass.blogspot.com/2015/08/do-this-not-thatback-to-school-blog-hop.html
 

Alternative Ideas to Daily Reading Logs

Sunday, August 9, 2015


My Dream: All of my students have a book in their hands at all times and run to the library for the next great book choice as soon as they finish the previous great book choice.

My Reality: A handful of students run for the bookshelf; a handful of students walk to the bookshelf, and a handful of students have to be pointed in the direction of the bookshelf.


Since not all students are avid readers, it is nice to have an accountability system in the classroom to track and encourage independent reading. It does not have to be a daily reading log (insert opinion here-- I loathe and detest dislike daily reading logs for upper elementary readers).

In the primary grades when students are learning to read, a daily reading log works well, so students can improve fluency and build their sight word banks. In the older grades when students are reading to learn, I am in favor of more independence when it comes to free reading.

There are many options that do not involve the teacher (and parents) tracking a daily reading goal, which turns reading into something a student HAS to do not something a student GETS to do. There is a big difference in the mind of a student, and motivation is a huge piece to building readers.


1. Have students Track Completed Books, not daily minutes or pages. When students finish a whole book, they log the book title and pages (and maybe reading level too). This works well for all level of readers. Some students may read one longer book or many shorter books. Teachers can monitor by informally checking with each student once a week to ask about book titles and how far along in the book the student is. When a book is complete, the student records the book on their Student Reading Log; the teacher logs the book too. Everybody has a record.

2. Have a short class book chat each day and assign students specific days to present a book. Students read aloud a short passage from their book that they pre-select and briefly discuss what is good (bad?) about the book, character(s) they like, events that are exciting (sad, funny...). Students must have something new to present each time it is their turn. Depending on how many students go each day, a student would need to present a book chat about every two weeks. That would encourage continuous reading. This 5-minute task also provides practice with oral reading fluency and public speaking. 

3. If you use the Accelerated Reader system at your school, assign each student a point goal for each month or grading period (or week). Students can self monitor to reach their point requirement. Easier books have lower point values, so students would need to read more books. If a student chooses a more challenging book, the book might take longer to read but provide more points. Teachers can differentiate reading levels by assigning different point goals to low, middle, and high readers. Set benchmarks throughout the time period (earn X amount of points by this date).

  
4. Require brief assessments when students complete a book to quickly check for comprehension. Complete a short recommendation form; take an AR test, fill out a Book Buddy Bookmark. Avoid big projects or lengthy writing assignments for independent book choices. Save those projects for the books and stories you read as part of language arts class. First of all, that is too much grading for a teacher. Secondly, when students know they will be required to "think deeply" about a book in assignment form, they read less. It interrupts the pure enjoyment (and free part) of a "free" reading book choice.

Other Book Motivator Ideas

  • Allow students to set a personal reading goal. I love Penny Kittle's Book Stacks for middle and high school readers or the idea of a "Tower of Books." 
  • Write Read Me Blurbs about a book (or even a hashtag style comment) on strips of paper and insert the paper on the shelf with the book, so other students may read the comments to encourage new book choices.
  • Each time a student completes a book, he/she can write the book title and author on a piece of paper and add it to a jar or container of some kind. The teacher draws book titles from the jar and that is the book that the teacher will read next. A student may not add titles to the teacher jar unless he or she has read the book.
  • Have students keep a Book Journal. At the end of a block of time (one month, one grading period...), review the book titles and make assessments about the styles of books, book author choices, length/difficulty of books, plots, likes, dislikes, and improvements in reading abilities from the previous book journal reflection. Keep the reflection on its own page in the book journal.

Please share any of your student independent reading ideas in the comments below and happy reading this school year!

Caitlin

What to Buy at the Back to School Sale

Monday, August 3, 2015


Planning to shop the Teachers Pay Teachers Back to School Sale? Me too. I am having a tough time prioritizing what I need. If you are in the same boat as I am, check out some great Lesson Deli sellers "must haves" and happy shopping! (Don't forget to use code BTS15 at checkout.)

 Grammar Flip Chart

The Grammar Flip Chart: This product includes easy to follow notes and tips for all of the essential parts of speech and sentence structures. The product includes 3 options for building the flipchart (cascading cards, binder ring, Dollar Store photo album). Click HERE to see the product.

 Greek and Latin Root Bundle

Greek and Latin Root Bundle: 40 weekly lessons including hands on activities. Great for Daily 5 Word Work! Click HERE to see the product.

 Decimal ZAP Bundle

Decimal ZAP Bundle: Zap games are quick and easy to implement. Add them to a corner of your room for early finishers to pick and play. Click HERE to see the product.
 SS Quick Checks
4th Grade Social Studies Spiral Review: This 30 page set will have your students reviewing key concepts for the new Learning Standards in 4th grade all year long! Click HERE to see the product. (5th grade version also available)

 Common Core 4th Math Club

Common Core Club 4th Grade Math Membership: This growing bundle is a great value. Purchase an entire year's worth of 4th grade math resources that includes task cards, games, homework, and assessments. Click HERE to see the product.

 ELA Made Easy

ELA Made Easy: An Upper Elementary Resource Bundle: If you are looking to implement the Daily 5 in your classroom, this bundle will make your life very easy! Click HERE to see the product.

 Spot It Game

Personification Spot It and Steal It Game: Personification is a breeze to teach with this engaging, hands-on game! Click HERE to see the product.

The Lesson Deli

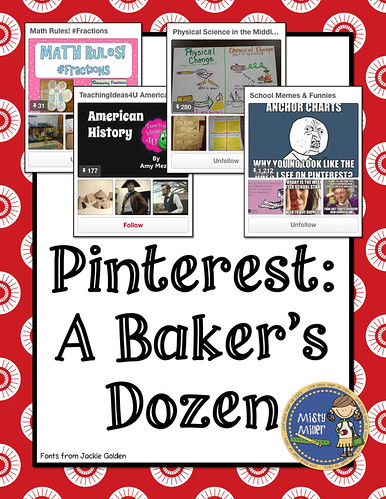
Pinterest: A Baker's Dozen

Sunday, August 2, 2015

Pinterest: A Baker's Dozen

I love Pinterest! Whether I am searching for a fabulous dessert, the next craft project, or an idea for the classroom, I'm on Pinterest. Today I'm bringing you some favorite boards from the Lesson Deli ladies.

1. Diane from Fifth in the Middle just loves Bright Ideas for the Classroom. This board is full of great ideas that you can easily incorporate into your classroom.
Pinterest: A Baker's Dozen

2. Everyone loves a good chuckle, especially with memes. The Pensive Sloth has created a board full of School Memes & Funnies.
Pinterest: A Baker's Dozen

3. Are you looking for some physical science ideas? Check out Physical Science in the Middle Grades for ideas to teach vocabulary and get hands-on STEM activities.
Pinterest: A Baker's Dozen

4. Good boards for history and social studies are hard to find. 5th Grade Social Studies from The Whimsical Teacher is filled with great geography and history pins.
Pinterest: A Baker's Dozen

5. Need a gift idea for a teacher? Caitlin from The Room Mom has gathered some terrific ideas on her board: Good Teacher Gifts.
Pinterest: A Baker's Dozen

6. Fractions are a hard concept for kids to master. For some fabulous fraction ideas, check out Math Rules! #Fractions by Interactive Learning from Miss Stefany.
Pinterest: A Baker's Dozen

7. Stefany also has a board for tutoring. Check out Tutor Tools for tutoring and teaching ideas.
Pinterest: A Baker's Dozen

8. How organized are you? I know I can always use some help in this area. Amy from Teaching Ideas 4 U has a solution. She's created a Classroom Organization board to help us all out. Many organization ideas posted here.
Pinterest: A Baker's Dozen

9. Amy also has an American History board for grades 3-8.
Pinterest: A Baker's Dozen

10. For those of you that are teachers in Ohio, you need to check out this board! Jennifer from JB Creations has a Pinterest board for Ohio Teaching Resources.
Pinterest: A Baker's Dozen

11. Another board Jennifer offers is Education. You can find all sorts of goodies here that pertain to the classroom.
Pinterest: A Baker's Dozen

12. I have several teaching boards on my Pinterest account. My favorite board, however, is my Recipe board. I love to bake and collect recipes. You might just find something to make and take into the teacher's lounge.
Pinterest: A Baker's Dozen

13. The Lesson Deli offers several boards on Pinterest for teachers of the middle grades. We have boards on math, reading, writing, social studies, science, holidays, classroom ideas, and teacher humor.
Pinterest: A Baker's Dozen

Be sure to check them out and follow us!


I Don't Use a Clip Chart

Monday, July 20, 2015

I admit… I have school on the brain right now. It’s near the end of July, and I can’t think about anything else. I’m reading different blogs about setting up classrooms and ideas for what to do during the first days of school. I’m wandering through stores looking at all the school supplies.

I think as teachers, we are wired this way. It’s a natural high of excitement. But I also think it’s a way for teachers to freshly evaluate their game plan for beginning the school year. It’s a new year, a new group of students, and sometimes (as in my case) a completely new school. I just spent 6 weeks teaching in a Learning Loss Prevention program with our local YMCA and school district. I wasn’t sure if I would end up loving this program, primarily because I teach 5th grade and I was working with rising 1st graders. But I loved it! They were so excited about learning and had fun with (almost) everything that we did. I was reminded, thought, of the one behavior management system trend that I do not like. The ever famous clip chart!
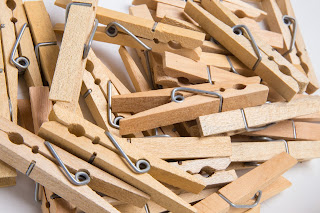

 Yep, I’m one of the few that will not use such a chart for many reasons. We used a clip chart this summer because that’s what the kids were used to. But I know that I wasn’t consistent with moving kids like I needed to be. We used it as a “clip up” for those students who were doing the right thing when others maybe were not. But I know we singled out a few when more could have also clipped up.

Here's why I don't like them...

1. I personally can’t keep up with all the clips for all the students in a fair way that still allows me to teach.

2. If consistency is the name of the behavior management game, what is consistent in a system that gives the same consequence/reward for everyone, even if it’s not the best for that child? If Student A responds well to verbal praise and public recognition, but Student B would rather a quiet and personal thumbs up or a sticker at the end of the day, then a “cookie-cutter” clip chart isn’t the best way. It works the same way with consequences. Not all consequences work for all students. You have to find what works best.

3. I find that if I’m really trying to be consistent with moving clips up and down, my focus is taken off my lessons. That can’t happen.

4. Kids have melt downs. Yep. Ask them to move their clips down, and they cry. Freak out. Shut down. Problem just became bigger and more complex.


So… what do I do? I think I’m still in search for the “perfect” idea, but I’ll share my tidbits of advice.

1. I first have to understand that my students are kids. They need redirection. They need to learn from their mistakes. So, I don’t pounce on them for minor infractions. We talk A LOT about what community in the classroom is supposed to look like, celebrate successes when I see students doing positive things, and talk about things that need to change. Just like a family.

2. Class meetings are essential. It doesn’t matter what you call them – Town Hall Meetings, Pow-Wows, Chit-Chats… The important thing is that you have them. This is where students should feel safe to share. We talk about anything from what we did to make the previous day successful, character values, problem solving (this is where behavior training comes in).

3. I like to find picture books that address issues we are having in class. By using a picture book, I can talk about an issue without referring directly to the issue. It’s a more passive way. Generic setting and characters from a story. This way, students feel free to discuss the problem/situation in a story without pointing out or embarrassing each other. We still get to talk about it.

4. I hold individual student meetings to discuss problems that aren’t being solved. These would be those classroom issues that students need a little more nudging and consequences from me to be resolved. If a student is unable to correct a problem after my own attempts at giving warnings and redirection, I tell them that I will meet with them at recess. Then I continue with my lesson. The student knows that we’ll continue this conversation at recess (or when I can get a minute away from teaching). They key here is training the students to know that I will not continue having a conversation/argument in class at that moment. They have to trust me, knowing that they will have a chance to be heard. That is the secret to classroom management. If students know they will be heard and treated fairly, they will comply.

5. I generally leave consequences up to the individual student and situation. Not all punishments fit the crime, and it’s my duty to find what works. This becomes a discussion during our class meeting; what does fair mean? As I’m having a meeting with a student, we discuss possible consequences, and I let the student choose what they think will be best. This is all part of Love and Logic thinking (https://www.loveandlogic.com/educators/what-is-love-and-logic-for-teachers).

6. If my students need a visual reminder, I will put a student list on a clipboard. If they need a warning, they can place a checkmark by their name. We just rotate the clipboard as needed. I’ve also had a 3 ring binder called “The Book.” I know. Original. It works for 5th graders, though. If they’ve had way too many warnings, I may have the student sign the book. Along with their signature, they have to write a couple sentences about what’s going on. This gives me written documentation for administration purposes or a parent conference.

The key is, keep things simple. Don’t let student behaviors take away from the important learning in your classroom.

If you’re interested, here’s a freebie form you can use for having students think about their choices.

Thanks for reading! I'd love to hear what works for you in your classroom!
- Martha from "The Owl Spot"

Christmas in July Sale

Sunday, July 12, 2015

 Stop by Simone's Math Resources on July 13 and 14 for a great sale.
https://www.teacherspayteachers.com/Store/Simone

There will be four super deals listed in the featured items section. These bundles will be on sale for 50% off of their original value.

The rest of the store will be on sale for 20% off.

This is a great time to stock up for the upcoming school year.

How to Make a Teacher Desk Organizer

Wednesday, July 1, 2015


Okay, so for those of you who read my blog, you know I really can't resist trying these really crafty teacher ideas.  I may be late to the party, but I saw a few of the desk organizers made out of the small gray plastic toolboxes and thought they would be awesome!  I am toying with ditching a traditional desk this year, and was wondering where I would store all that junk that gets lost in a desk.  Also, my home "office" is a kitchen nook, and you don't even want to know how junked up the counters and drawers get.  I thought this desk organizer might be the answer to my prayers.
How To
First, take a trip to the hardware store.  You need the toolkit and spray paint made for plastic.  Although the paint said no sanding, I still sanded just in case.  Couldn't hurt, right?

Tip:  If you are not a good painter or are new to spray painting, spray painting outside in the wind is
NOT a good idea.  Don't be so anxious to get it done that you have to buy twice the amount of paint!

I decided I wanted to paint my drawers as well, but that is completely not necessary.  It does make some of the drawers stick a bit, but with use the paint on the tracks will wear off.

Allow the paint to dry completely.  Again, patience.  Wait!

Once the paint dries, you just assemble it.  Since I painted my drawers, I Mod Podged my labels on.  If you leave the drawers clear, then you can attach the labels inside the drawers.

Once you have your labels on, you are all set.  Now you get to the fun part - cleaning up your clutter!  (Okay, for me, there is just this great sense of relief when I clear up a bunch of clutter that has been bugging me.  Anyone else?)  It is just amazing how much you can fit in these!  They do make other sizes of the toolboxes as well, but I
felt like this one would be enough.  If I taught primary, I might want more drawers - I don't use a lot of stickers and things on a regular basis.

If you like my labels, I made them with Cherry Workshop's Summer Backgrounds Stained Glass Digital Paper and KB3's AlphaBasicSans font.  Both can be found on TeachersPayTeachers.

What is your best classroom organization tip?

Amy

4 Shortcuts for Creating and Formatting Graphic Organizers

Tuesday, June 9, 2015


I am a table girl. I use them all of the time to create graphic organizers for my class. I like how they provide a framework and direction for the students. After students add information to a graphic organizer, the ideas are sorted and grouped in a way that help students develop generalizations for our units of study, review key concepts, and visualize a big picture.

I use MS Word (I know-- I am in the minority) to build all of my graphic organizers. Since many schools use Word as the primary way to publish documents in the classroom, I thought it might be worth sharing some of my formatting strategies. These are good technology tips for both teachers and students.


The best tip I can give people using MS Word is to turn the formatting button on. This shows all of the background strokes you use while creating a document. None of the background symbols appear when printing, but it allows you to see where you have pressed buttons and what types of spacing you have. If your students have all kinds of funky formatting happening in their school documents, turn the formatting button ON to see all of the times they pressed ENTER!


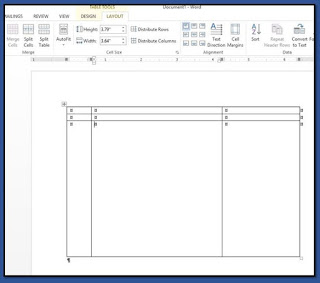
Next, insert a basic table with the needed numbers of rows and columns. Don't worry if you want to add or delete rows and columns later; it is easy to do. Once you have a basic table in the Word document, you are ready to customize. Most of the functions you will use will be accessed under the LAYOUT tab. This tab is only visible when you have clicked your cursor inside a cell (one of the boxes) on the table.

1. Making the Table Larger


  • To make the table cells (boxes) larger, hover the cursor over the bottom line. When it changes to two parallel lines with an up and down arrow, left click, hold, and drag down. 
  • To move any of the gridlines within the table, hover over the lines you would like to move, wait for the parallel icon with up down arrows to appear, left click, hold, and drag. 


2. Making the Rows and Columns Equal Sizes


  • To distribute rows evenly, highlight all of the rows you would like to be the same height. Select distribute rows in the LAYOUT tab. To distribute columns evenly, highlight all of the columns you would like to be the same width. Select distribute columns. This is where the formatting function comes in handy. There will be a small circle inside each cell. You can see if you have grabbed the cells you need by making sure the little circles in the appropriate boxes are highlighted. 


3. Adding Rows and Columns


  • To insert additional rows or columns, click your cursor in the cell next to where you want to add the row or column. Choose insert above, below, right, or left depending on what you need. 


4. Adding and Formatting Text


  • To add text, click in the cell where you need the text. Type your words (I like to add all words first then work on the formatting). 
  • To change the font, make the size, bigger, center, etc. use the buttons in the HOME tab you use when formatting regular documents. 
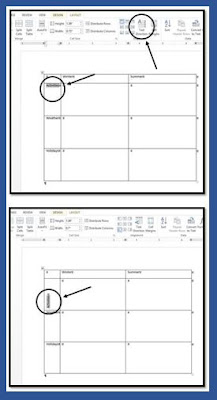
  • To change the text direction, highlight the text you want to flip and click the text direction button. Click multiple times until the text is turned the direction you need.


  • To align the text within the cell, click the text symbols that show different line spacing within a box right next to the text direction button. 


Spend some time clicking around in the LAYOUT tab of your document. You can merge and split cells, turn gridlines on and off, and add background colors to each cell, row, or column. You can also click outside of your table and insert clipart pictures. Right click on the picture and choose wrap text/in front of text. After that, you can drag your picture anywhere on your page.

For a printable version of these table tips with step by step instructions and screen shots, visit Creating a Graphic Organizer to download. I also have free printable directions for formatting MS Word essay documents available for free at my TeachersPayTeachers store.

Happy Creating!
Caitlin
TheRoomMom