Image Map

These are a Few of My Favorite Things!

Wednesday, August 20, 2014


With the upcoming TeachersPayTeachers one day sale on Wednesday 8/20 (my birthday!), I have been thinking and adding to my TPT wishlist.  I bought a few items at the last sale, but I know this will be the last big sale for a while so I want to grab everything now!

Last year was my first year back in the classroom after teaching middle school online for 6 years.  I gave all of my elementary items away during that time period, so I basically have started over from scratch.  I reflected on what went well last year, as well as, well, let’s just say what could have gone better….
After a lot of research, I found a few products that I think will really help me be very structured this year.  The group we have coming in needs the structure, and honestly, with 8th and 4th graders of my own, I need the structure!

     
1.  Spiral Math Homework – Our grade level has a lot – A LOT – of below grade level students in math.  One thing I noticed last year was that kids were very weak in number sense, and just didn’t retain the skills they learned.  This product, Spiral Math Homework, will really help with that problem.  It is editable, so you can change the problems to fit your students.  Students are given 10 math problems each night in different skill areas, so they are constantly reviewing all math skills.  I also like that kids get Monday – Thursday’s homework on one page.  That helps the busy kids plan out their homework in advance.  This is available for different grade levels.  


2.   Picture Thesaurus Bundle – Honestly, these are awesome.  Truly awesome.  I would have a picture of how they look in my classroom, but I was told I have to wait before I can laminate more itemsL  These are going to really help liven up the writing area.  The words are available separately, but I feel they are most effective when you have multiple cards.  The author took synonyms for “overused” words and grouped them with an illustration that fits their meaning.  No more randomly selecting a synonym that doesn’t make sense!  Very eye appealing product.


3.     Interactive Writing Notebook - I am also very excited to use this year-long writing curriculum.  Our school has not had a very strong writing program, and that is our school goal this year.  I know the teacher that developed this curriculum, and almost every one of her students scored in the top writing level last year.  She has organized and created these for multiple grade levels.


4.     9 Fiction & Nonfiction Craftivity Book Report Projects & Interactive Notebook Bundle – I have to say, of all the things I created for my classroom this summer, I am most excited about this.  Last year I attempted to teach the reading application skills using another teacher’s method, and it bombed.  My kids scored terribly – not because it was a bad strategy, but rather it just wasn’t my style.  I like “crafty.”  I know many upper grade teachers don’t, but honestly give me an art project and I will do just about anything you want with it!
I was inspired to make craftivity projects, which you see more frequently for primary grades.  These craftivities involve higher content though.  For example, the banana split teaches and reinforces the elements of fiction, while the popcorn box teaches theme and conflict.  There are 9 total fiction and nonfiction projects that can be used as a spiral curriculum throughout the year or as separate items.  I created an interactive notebook that coordinates with these lessons, and that is also included in the bundle.  


I am feeling very positive about these projects, because my upcoming 4th grader actually asked me to do the projects over the summer.  Now I love my son, but he would normally rather pull his eyeteeth out than read a book.  I warned him he had to read a book to make the project, and his response was “okay.”  Success!

What is your must have product for your classroom?

Amy Mezni


Protecting Paperback Books

Sunday, August 17, 2014

classroom library

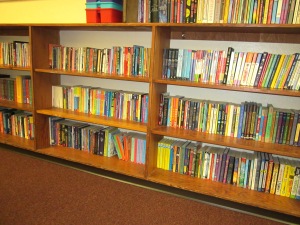
My classroom library is my pride and joy. It is like a third child to me, and I take great pains to protect it. Many student hands come in daily contact with the book collection and have the potential to destroy one of my cherished books. One defense I use to protect my library is to wrap each book in clear contact paper. This is a labor of love for sure but well worth it. If you have invested both time and money in a quality classroom library, wrapping your books will extend their lifespan.

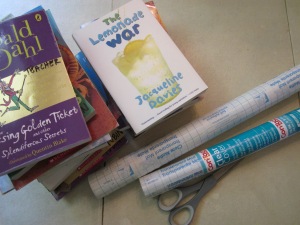
covering books materials

Materials
  • Con-Tact Brand Shelf Adhesive Shelf Liner clear with matte finish and gridlines (I usually purchase at WalMart or Staples)
  • paperback books
  • sharp scissors
  • clear, flat surface like a large tabletop with a straight edge
Directions
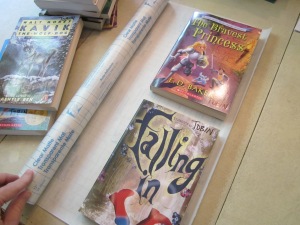
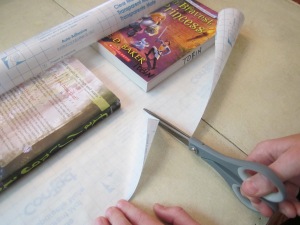
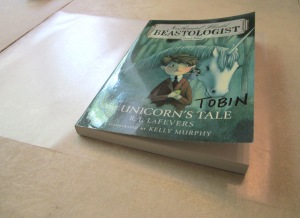
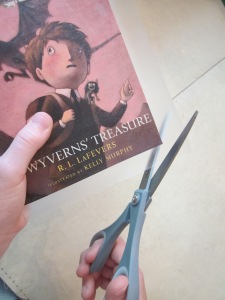
  • For standard sized paperback books, measure 2 books of about the same size at the same time. Unroll a little of the contact paper with the gridlines facing down and the roll unwrapping to the left. Set two books, cover facing up, on the contact paper. The books act as a weight to hold the contact paper still as well as guidelines for measuring the size of the cover needed for the book.
covering books step 1
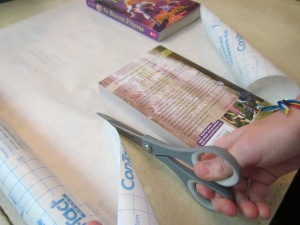
  • Carefully take the fattest book and roll it over the contact paper to the left, so the cover will be face down. This measures the length of contact paper you will need for both books. Cut the contact paper about 1 inch beyond the edge of the fatter book. Use the gridlines to help cut straight lines.
covering books step 2
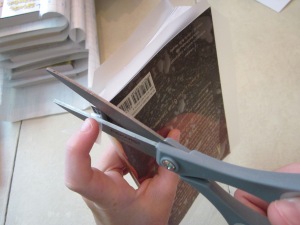
  • Keeping the books spaced on the contact paper, cut down the center of the two books making sure there is (roughly) even amounts of contact paper above and below the edges of each book.
covering books step 3
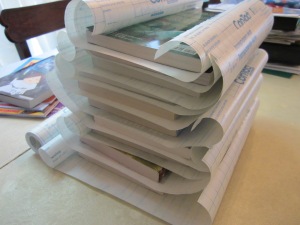
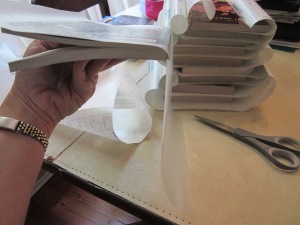
  • Cut sheets of contact paper for all books that need to be covered at one time to make the process more efficient. Keep each book with its matching piece of contact paper.
covering books contact paper prep
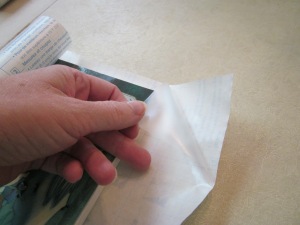
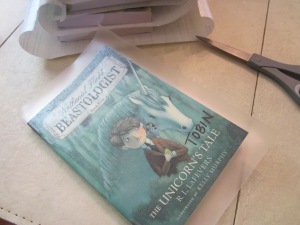
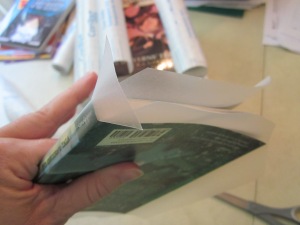
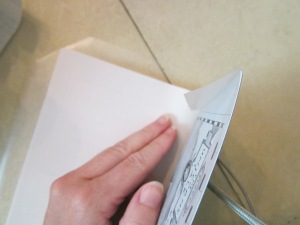
  • Take one piece of contact paper and put it on a flat, clear surface with the gridlines down. Set the book that goes with that piece of contact paper on top. The paper rolls up a little, and the book helps keep the contact paper spread out. Using your fingernail, gently peel away the paper backing starting at the top or bottom corner. I like to start with the top right corner, and I am right-handed. If you do not pull the backing away evenly, the paper will crease leaving a line that looks like a scratch (which drives me crazy). As you pull the backing away, lift the paper up off the table letting the book fall off.
covering books step 4

covering books step 4a
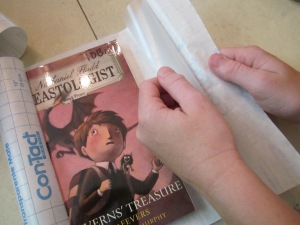
  • Once the backing is off the contact paper exposing the sticky side, place the paper sticky side up on your flat surface landscape direction. Have the bottom edge of the contact paper line up with the bottom, straight edge of the table. This will help keep book placement on the contact paper straight and even.
  • Gently set the back cover of your book near the right edge of the contact paper. Try to leave about a 1-inch border on the top, bottom, and right side of the book. In other words, center the top and bottom of the book on the contact paper and have the book close to the right edge of the contact paper.
covering books step 5
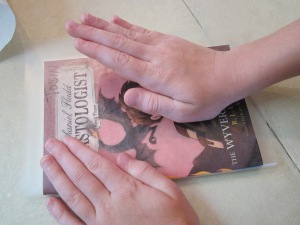
  • Pick up the book from the right side and smooth the back of the book with your free hand. Begin to wrap and push the contact paper around the spine of the book. Turn the book over and carefully press the contact paper across the cover pushing from the spine towards the loose end of the pages.
covering books step 6

covering books step 7
  • Smooth out any bubbles between the book and contact paper by pushing gently with your fingers and/or heel of your hand to the closest edge.
covering books step 7a
  • With your scissors, cut diagonally along the top 2 outside corners and the bottom 2 outside corners. You will snip off triangles.
covering books step 8b
  • Make diagonal snips on the front and back corners near the spine.
covering books step 8
  • Press the sticky tab of contact paper on the top of the spine to your pointer finger and pull it back and down until it separates just a little below the spine of the book. Snip the tab of contact paper off the book. Repeat at the other edge of the spine.
covering books step 9a
  • You will now have 3 flaps hanging over the edge of the front cover of the book and 3 flaps on the back. Carefully wrap the flaps around the cover of the book and stick them down to the inside of the covers, pressing carefully to avoid wrinkles.
covering books step 10

covering books step 10a
Notes
  • Your first few books will probably have wrinkles and mis-aligned contact paper. You get better (and faster) at covering the more you practice!
  • There are a variety of clear "shelf" papers available. The Con-Tact brand is my favorite, and the easiest for me to use.
  • If you have a large library, I would not recommend going back to cover every book. I would begin covering any new books that you add to your collection and any damaged books that you have.
  • To cover a damaged book (hardback or paperback), repair with clear packing tape first, then wrap in contact paper.
classroom library 3

 I would love to hear some other suggestions to help care for a classroom library. What steps do you take to keep the books in good condition and accounted for? 

Caitlin Tobin

Missing Papers? Easily Monitor Student Work

Thursday, August 14, 2014

Have you ever graded papers only realize that some students didn’t turn their work in?  It’s so frustrating!  You waste so much time tracking the student down and then begging for them to finish the work.  If this happens to you, you may want to try this idea for a student work area.


I make a file organizer out of folders.  You can recycle old folders – they don’t need to be nice!  To make this you will need:

-         A bunch of folders                             
-         A ruler
-         Scissors
-         Stapler
-         Pencil
-         Markers or Glue and Numbers

First, turn the folders on the back.  I recommend making the flaps a little bit thick.  I had thinner ones last year, and making the pieces wider is a bit sturdier.  I use a ruler to measure every 3.5” (about 9 cm) on the horizontal (hot dog) side of the folder.  Make marks about every 3.5”, then do it again somewhere else on the folder.  Then use the ruler to draw the dividing lines where you will cut.   I was able to cut three strips from each folder. 


 Now, cut along the lines.  I also cut the “tab” off the top of the ruler in order to help make the pieces more even.  I was able to get 3 strips out of each folder.  If you are just using manila folders, divided the number of students by 3 and that is the number of folders you will need to cut.  (You may want to add a few extras……) 
Also, and this is optional, you may want to splurge and get colored folders.  I had a few students last year that would regularly stick their paper in the number before them.  With colors, the students can see if they are in the correct area because the students before and after them have different colors;)

Once you have cut all of your strips, organize them the way you want them.  For example, I organized mine in the color pattern I wanted.  (Again, if your strips are all one color you can just put them in one pile.)  In these pictures, I printed the numbers from my décor pack and glued them on.  However, if you are pressed for time, you can simply use a marker and number them.


Now, to hook them together, you want to lay the strips down so they are staggered.  I laid mine out in strips of 4.  If you look at the photo, I start with the bottom strip and lay that to the right.  Then I staggered the other strips on top going left.  Once you do that, you are ready to staple them together. 
*Trust me, having smaller sections is much, much better.  Long strips do not fit in a cupboard, and you cannot separate the students as easily.  I will sometimes have #1-8 turn in at this section of the counter, then put #9 - 16 farther down, etc.


The stapling is where some people have trouble.  Look at the picture above.  Start by stapling the top two strips.  You are stapling the back fold of the top strip to the front fold of the next strip.  I staple one on each side toward the top of the strips, then one in the middle above the fold.  (The fold is higher on the bottom strip.)

Stapling the third and fourth strips on is a bit trickier.  I do it by holding the back of the bottom strip and matching the top flap of the next strip to that.  Staple again.
Once you have four numbers connected, begin stapling a new strip of four:D

So, how exactly does this magical tool work?  Easy!  Lay it out anywhere you have in your room.  It needs to be fairly accessible, as students will walk over and turn in their paper.  (A location far from other students is always nice if you have one.)  Again, you can split the numbers up so that the students are not clumping together.  If you are like me and use this as your regular independent work turn in area, it is better to leave it in the same location.  Students get in the habit of turning work in, but if you move it a lot they will get confused.

Now, here is an example of a section with papers “turned in.”  Can you tell which “student” didn’t turn in a paper?


If you said #3, you are correct!  You can easily see that a paper is missing.  If you are trying to wrap up independent work time or go to recess, you can go by your organizer and see at a glance who is missing work.  (I use students’ numbers for everything.  The kids learn their numbers – and everyone else’s – pretty quickly.)

I am thinking about putting contact paper on mine, but honestly, I recycled old files last year and that one is still in good condition.  These are fairly sturdy and can last a few years even without extra support.

My coworker uses this same system, but instead of turning in papers, she has a student sort the papers to pass back in the numbers.  Then all she has to do is hand one pile of papers to each student.

This method was a lifesaver for me last year!  What is your top time saving classroom tip?

Amy Mezni


Blasting Back to School Giveaway WINNER!

Monday, August 11, 2014

Paula, check your e-mail!

Blasting Back to School: Blog Hop & Giveaway

Monday, August 4, 2014


a Rafflecopter giveaway

Begin the blog hop by visiting Mrs. Smith over at Performing in Fifth Grade. She's giving away a customized teacher necklace and lanyard!


Visit all 13 blogs to earn bonus entries! You can go from page to page, or visit them from the links below!


Thank you for the beautiful graphics used in this giveaway: The Enlightened Elephant and Winchester Lambourne! Thank you Graphics from the Pond and KG Fonts for the awesome fonts!